| Flaw Detector | Fruit Hardness tester | Rockwell hardness tester | Force gauge | Thickness gauge |
[News] Sterilizer and Distiller
[News] Force Gauge
[Notice] Rockwell Hardness tester
[Event] New Hardness tester on li
[News] We have become the member
[News] UFD610 Ultrasonic Flaw de
[Promote] Fruit Hardness Tester
[News] Force Gauge
[Notice] Rockwell Hardness tester
[Event] New Hardness tester on li
[News] We have become the member
[News] UFD610 Ultrasonic Flaw de
[Promote] Fruit Hardness Tester
✤ Home > Products > Coating Thickness Gauge > Coating Thickness Gauge CM1210FN-B (Statistics) Details
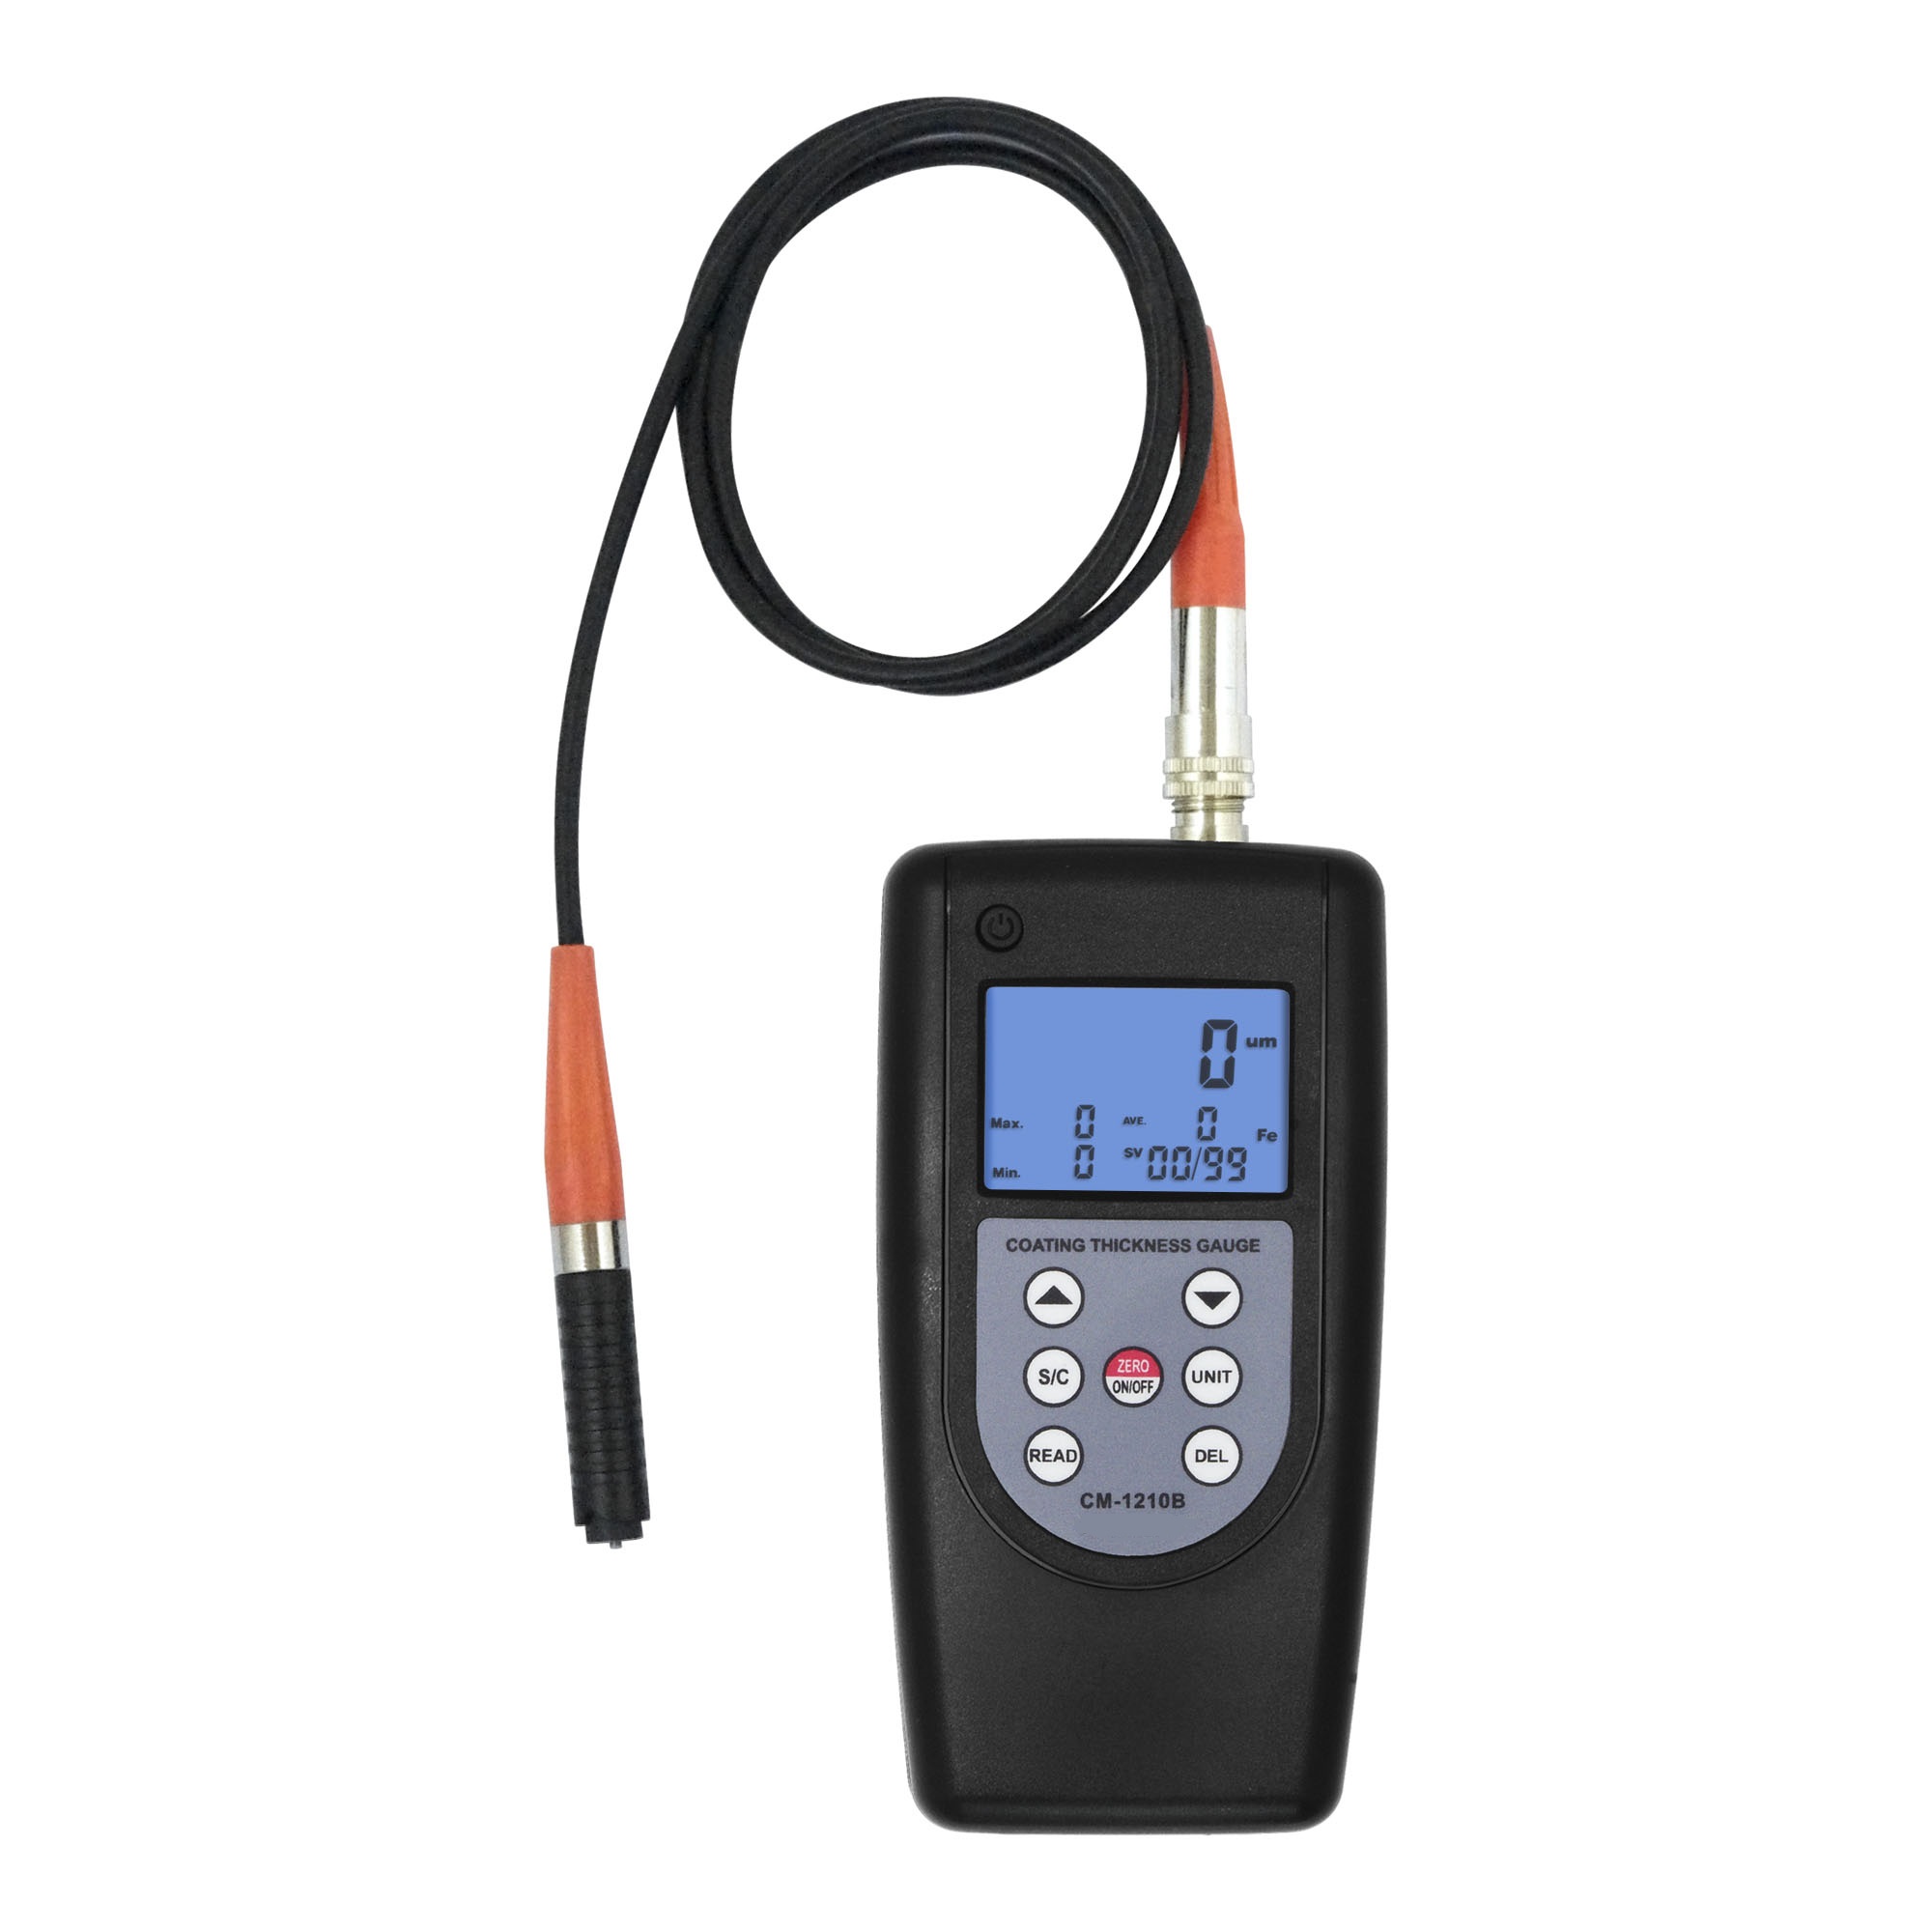
Coating Thickness Gauge CM1210FN-B (Statistics)
[Specifications]:
Can store the new data in 99 groups.
Two measuring methods: magnetic induction (F) and eddy current (N).
* Two measurement mode: Single and Continuous(Notice:Continuous mode is convenient to measure the coating thickness of
[Coating Thickness Gauge CM1210FN-B (Statistics) Product details]:
Features,
* Can store the new data in 99 groups.Statistics for average value, maximum value and minimum value.
* Two measuring methods: magnetic induction (F) and eddy current (N)
* Two measurement mode: Single and Continuous(Notice:Continuous mode is convenient to measure the coating thickness of curved objects and tiny objects.)
* Metric/imperial system selectable.
* Manual or automatic shut down.
* Automatic memory of calibration value,and automatic recognize the substrate.
* Operation process have buzzing reminder,while no buzzing in continuous mode.
* Use USB/RS-232 data output to connect with PC.
* Provide Bluetooth data output choice.
* Separate Type can provide several type probe, measure can be more flexibility.
Specification,
Features,
* Can store the new data in 99 groups.Statistics for average value, maximum value and minimum value.
* Two measuring methods: magnetic induction (F) and eddy current (N)
* Two measurement mode: Single and Continuous(Notice:Continuous mode is convenient to measure the coating thickness of curved objects and tiny objects.)
* Metric/imperial system selectable.
* Manual or automatic shut down.
* Automatic memory of calibration value,and automatic recognize the substrate.
* Operation process have buzzing reminder,while no buzzing in continuous mode.
* Use USB/RS-232 data output to connect with PC.
* Provide Bluetooth data output choice.
* Separate Type can provide several type probe, measure can be more flexibility.
| Principles | Applications | Examples |
|
F Type Magnetic Induction (Iron Base) |
Measure the thickness of non-magnetic materials on magnetic materials | Galvanizing layer, lacquer layer, porcelain enamel layer, phosphide layer, copper tile, aluminium tile, some alloy tile, paper etc |
|
NF Type Eddy Current (Aluminium Base) |
Measure the thickness of non-conductive coatings on non-magnetic metals | Anodizing, varnish, paint, enamel, plastic coatings, powder, etc. Applied to aluminum, brass, non-magnetic stainless steel, etc |
Specification,
|
Principle
|
F Magnetic Induction & NF Type Eddy Current
|
|
Range
|
0~2000µm/0~80mil
|
|
Resolution
|
0.1µm/1µm
|
|
Accuracy
|
±1~3%n or ±2.5µm
|
|
Min.Radius Workpiece
|
F Type:convex 1.5mm/concave 25mm
|
|
NF Type:convex 3mm/concave 50mm
|
|
|
Min.Measuring Area
|
6mm
|
|
Min.Sample Thickness
|
0.3mm
|
|
Metric/Imperial
|
√
|
|
Functions
|
Battery Indicator & Automatic Power Off
|
|
Data Memory
|
99 Groups
|
|
Operating Conditions
|
Temperature:0~40ºC
|
|
Humidity:10~90%RH
|
|
|
Power Supply
|
4x1.5V AAA (UM-4)Battery
|
|
Dimensions
|
140x72x34mm
|
|
Weight
|
215g(Not Including Batteries)
|
|
Standard Accessories
|
CM-1210A
|
CM-1210B
|
|
Main Unit
|
√
|
√
|
|
Probe (F & NF Type)
|
√
|
√
|
|
Calibration Base (F)
|
√
|
√
|
|
Calibration Base (NF)
|
√
|
√
|
|
Calibration Foils
|
1 set, 4 pieces
|
|
|
Carrying Case
|
B04
|
|
|
Operation Manual
|
√
|
|
|
Optional Accessories
|
RS-232C Data Cable with Software
|
|
|
Bluetooth Data Adapter with Software
|
||
| Force Gauge | Rockwell Hardness Tester | Roughness Tester | Thickness Gauge | Flaw Detector | Webster Barcol | Hardness Tester | Vibration Tester |

Beijing Lanetech Instruments Co., Ltd. Copyright 2008-2019 All Rights Reserved
Adress:1602 Lingdi,Beiyuan Lu, Chaoyang District,100012 Beijing
E-mail:sales@lanetechworld.com angelajade@126.com
Tel:+86-10-84956391
Hot-Line:+86-10-84956391
Adress:1602 Lingdi,Beiyuan Lu, Chaoyang District,100012 Beijing
E-mail:sales@lanetechworld.com angelajade@126.com
Tel:+86-10-84956391
Hot-Line:+86-10-84956391


